It can be tough to build a budget when things are tight. Not only are you learning a new method of budgeting, a new app, and new habits—on top of that, you’ve still got to feed the kids and find the money for the next bill. Enter: pounding, stress-inducing headache.
Hold on a second. Deep breath.
Let’s walk through what you can do—right out of the gate—even if you’re short on cash.
Step #1 : Rearrange your categories to better match your priorities. Here’s an example:

The first group “Must” is the fixed expenses. These are the bills I know are coming. They absolutely have to be paid and I have a pretty solid idea what they’ll be.
The second group “Need” is for variable expenses. These are the expenses I do know are coming, but I either don’t know when, or the amount varies. For example: Auto Maintenance. If you’ve got a car, it’s not a question of if it needs work, just when and how much.
The final group “Want” is optional expenses. These are the categories I hope I can budget for, but if things are tight, they may get put on the back burner. I don’t need to buy music right now. I hope to, but I can skip it if things are tight.
Not sure how to change categories? Watch this video to learn how.
Step #2 : Set up scheduled transactions.
The fixed expenses are probably the bills you dread most right now. Just when you get some breathing room, another one shows up to bite! But there’s some good news: these bills are predictable. We can spot them coming and get our budget ready to fight back.
Here’s how: set up scheduled transactions for each bill. YNAB will enter these transactions into the register on the scheduled date and reset the scheduled transaction to the next occurrence.

Because I added those scheduled transactions, if I look back on the budget I can see those orange alerts reminding me of the bills that are coming.
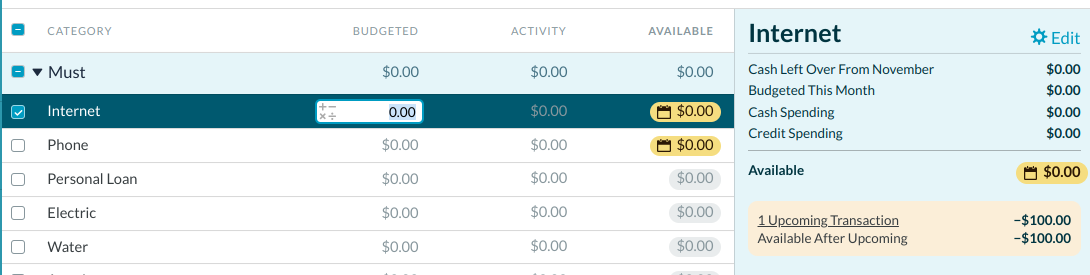
You can also drag these categories into the order they fall in the month. That way, when money arrives, you can budget your way down the screen.
Here’s how to set up a recurring transaction.
Step #3 : Add a Goal to each remaining Category.
Goals can help alert you in the other categories. I’ve added a monthly funding goal to groceries, because I want to be reminded that I need to budget $500 a month for groceries.

Now as you do this, you may find that for some of your categories, you have no idea how much to budget. Don’t worry about that. Just guess. Most people guess when they get started, it’s fine. You can always make changes later. So go ahead—turn those guesses into goals.
Watch this video to learn how to set goals in your budget.
If you select all the categories that have a goal or scheduled transaction attached, you’ll see a total on the right-hand side in “Underfunded”:
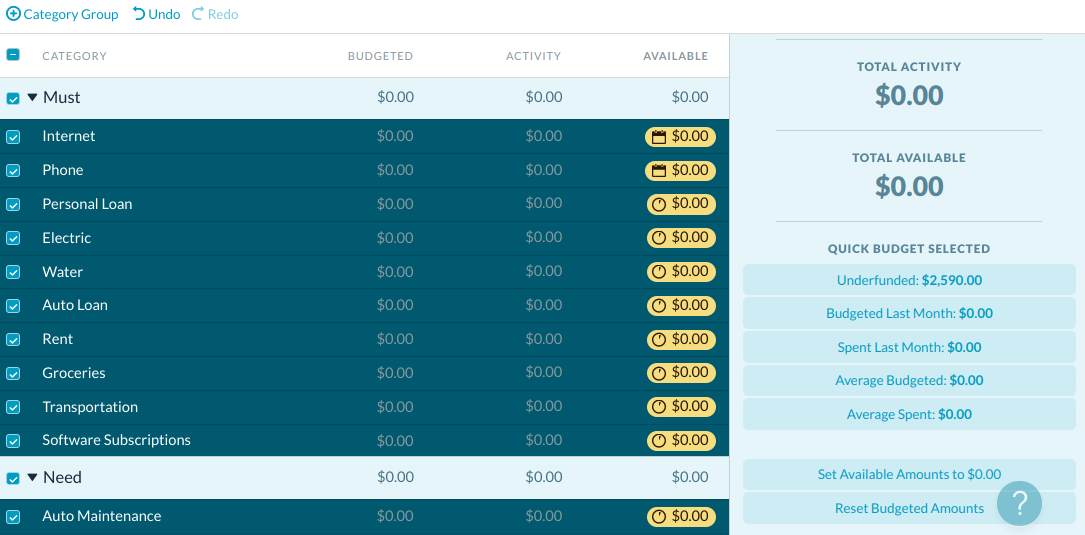
That’s what you need to bring in to cover all those categories. If you know you’ll bring in less than that, start making adjustments to the goals where you can. If you bring in more than that, you can start working on the optional categories.
Step #4 : Budget the dollars you have.
Make a very clear plan for the dollars you have. If you only have $148, it’s absolutely critical that you manage this money really well. Here’s the question you need to answer:
What does this money—this $148—need to do before I’m paid again?
Answer the question, and then assign those dollars where they’re needed most in the budget.
When you realize your money is a finite resource and you name one job—and only one job—for each dollar, the money starts to feel a little bit scarce. But scarcity is actually a good thing—it gives you clarity.
You’ll start noticing as you give every dollar a job that there is a finite number of them at any given time. It’s one reason to make sure that you really do name a job for each dollar. Your awareness will grow—because every time you spend a dollar, you’re making a choice.
Step #5: Track your spending.
Now that we’re organized and aware of what we have, and we’ve given every dollar a job, we need to stay completely on top of spending. That’s where things can go off the rails if you lose this awareness. We need laser focus.
Watch this video to see how to track spending manually in YNAB.
Before you spend, check the category to see what’s in there. Don’t look at your checking account balance—that doesn’t tell you anything about what these dollars are for. You need the budget for that.
It’s entirely possible that you’ll need to dip into overdraft and spend money you don’t have as you work your way through this. Let’s say there’s no money left in the budget, but you need to pay the phone bill of $65. You’ll still record this spending—after all, it did happen. You’ll be overspent in your phone category. And that’s true. You want to record what’s true so you have accurate information.
When you get paid next, first budget to cover that overspending. It’s worth mentioning that if you’re in this situation, you should strive to spend as little as possible—only spend what’s absolutely necessary.
Repeat steps #4 and #5.
Let time go by. This might be the hardest part, but these steps will bring progress. Money will come in, you’ll give each dollar a job, and you’ll check your budget (not your accounts) to make your spending decisions. You’ll start to feel less like you’re floundering and more like you’re in control of your money.
Hang in there, being broke is a stressful time. But you’re here, looking for another way, and you’re rewriting your story right now.
If you want extra support, check out our free live workshops where a YNAB teacher can help with everything from setting up a credit card in YNAB to breaking the paycheck to paycheck cycle.
The post How to Budget in YNAB When You’re Broke appeared first on You Need A Budget.
Via Finance http://www.rssmix.com/
No comments:
Post a Comment